There is a moment in a woodwork project when the making is almost done. The pieces have been cut, joined, shaped and sanded. The timber feels smooth under your hand, the grain is beginning to show itself properly, and the finish is waiting on the bench.
This is also the point where one small, overlooked step can undo a surprising amount of careful work.
Fine sanding dust is easy to underestimate. It can settle into the grain, sit along edges and corners, and remain on the surface even when the timber looks clean. Once oil, wax, paint or stain is applied, that dust can become trapped in the finish. The result may feel rough, dull or slightly gritty, even though the sanding itself was done well.
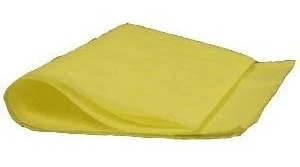
A tack cloth is used just before finishing to remove that last layer of dust. It is slightly sticky, so it lifts particles that an ordinary rag may simply move around. In my workshops, I use one after sanding hardwoods and softwoods and before almost any type of finish, including Danish oil, wax, paint and stain.
Stains should always be tested first, but the preparation principle remains the same. The cleaner the surface, the better chance the finish has to do its work.
The dust you cannot always see
Beginners often expect sanding dust to be obvious. They imagine piles of powder, perhaps gathered around the base of the project or sitting on the bench. Some dust is easy to see, especially after the first sand. It comes away in large amounts, and the cloth quickly turns brown.
The more troublesome dust is finer. It sits inside the open grain and clings to the surface. You may brush the timber with your hand and think it is clean, yet the moment a finish goes on, the remaining particles become much more noticeable.
This is why the final preparation matters so much. A finish does not hide poor preparation. In many cases, it reveals it.
Oil deepens the grain and draws attention to every mark. Wax highlights texture. Paint can trap specks and leave tiny bumps. Stain may settle unevenly if dust is still sitting on the surface.
When students understand this, sanding and cleaning stop feeling like unrelated chores. They begin to see them as part of the finish itself.
Related Reading -> Can I learn woodwork even if I’m nervous?
My two-cloth method
In the workshop, we keep two cloths in use.
The first is the well-worn one. It has already collected a serious amount of dust and is usually quite brown. We use this after each surface has been sanded and as students move through the sanding stages. Its job is to take away the bulk of the dust.
Once most of that has been removed, we use a fresher yellow cloth for the final clean. This one has less dust embedded in it, so it can do the finer work just before the finish is applied.
I like this system because it is practical. A new tack cloth does not need to be sacrificed to the first heavy cloud of dust. The older one keeps doing useful work, while the cleaner one is saved for the stage where it can make the greatest difference.
The cloths last a long time. As one becomes more laden, its role changes rather than ending. We store the brown one in a separate bag and return the cleaner one to its own original bag. Any suitable bag would do. The important thing is to keep the cloths contained so they do not collect dirt from the workshop or stick to other materials.
They are never moistened or wetted. The slight tackiness is already built into the product, and adding water would change the way it works.
Using a tack cloth firmly
People are sometimes surprised when I tell them that, for the final clean, we rub quite firmly. We are not floating the cloth timidly over the surface. We use pressure and friction, turning the cloth as we go so that a cleaner area is continually brought into contact with the timber.
This firm wiping can make a remarkable difference. Once the final dust is gone, the timber can look almost highly polished, even before any oil, wax or paint has touched it.
Students sometimes think something magical has happened, but what they are seeing is the quality of the surface they have already created. The dust had been disguising it.
There is one caution. Watch for splinters, especially along edges, corners or any place where the grain has lifted. The sticky cloth can catch on a small splinter and tear it back, which may spoil a surface that was otherwise ready to finish.
Apart from that, there is little to fear. This is one of those steps beginners cannot easily get wrong. The main thing is to be thorough, turn the cloth frequently, and pay attention to the full surface rather than wiping only the obvious flat areas.
What happens when this step is skipped?
I have seen students move forward without cleaning the surface properly. The disappointment comes later, once the finish is on and the timber feels rough.
By then, the problem is no longer loose dust that can simply be wiped away. It may be trapped beneath the first coat. Correcting it can mean waiting for the finish to dry, sanding again and repeating the preparation.
Most students in my classes do not escape the process because I keep track of where they are up to. I will ask whether they have used the tack cloth before they begin finishing. That small question protects the work they have already done.
It also teaches a wider lesson. In woodwork, many problems are easier to prevent than repair. Understanding why a step matters helps a beginner recognise the consequence before it happens.
They are no longer merely following an instruction. They are learning to read the material and anticipate what the finish will reveal.
Related Reading -> The best beginners project
Sanding without losing your place
Sanding produces very different reactions. I am continually amazed by the number of students who love it. They settle into the rhythm and would happily go on and on.
Others get as bored as I do.
For those students, I suggest being methodical rather than relying on enthusiasm. Keep track of each piece and each surface as it is completed. Move through the sandpaper grades in steady stages, usually increasing by about 20 or 30 grit at a time, rather than making a large jump.
A random orbital sander can speed up the process considerably when it suits the piece.
The aim is not endless sanding. It is controlled sanding.
If you lose track, it is easy to sand one face beautifully while missing another, or to move to a finer grit before the previous scratches have been removed. Cleaning with the older cloth after each surface is sanded helps here too. It clears away the dust so you can inspect the timber rather than guessing what is happening beneath it.
By the time the final sanding is complete, the fresher cloth becomes part of the last inspection. You are removing dust while also looking, touching and checking.
Storing your tack cloth
Some students really dislike the sticky feel. They use it because they understand its purpose, but they cannot wait to wash their hands afterwards.
That reaction is worth acknowledging. A product can be useful and still feel unpleasant to handle. I let students know that the cloths we use are described as non-toxic and free from wax and silicone. That usually settles their concern enough for them to continue comfortably.
The reassurance matters because people often hesitate when a product feels unfamiliar. Rather than dismissing the discomfort, I explain what the cloth is for, what the manufacturer says about it, and how we store it.
Some people may choose to wear gloves, while others simply wash their hands when they are done.
Clear information is always more useful than telling someone not to worry.
After use, put the cloth back into a bag. It does not have to be the original packaging, although that is what we use. Keeping it enclosed stops it from attracting workshop dirt and helps preserve its useful life.
Remember to store the dust-laden brown cloth separately from the fresher one. Otherwise, the cleaner cloth may pick up dust before it reaches the timber.
Why a tack cloth differs from an ordinary rag
A dry rag can remove visible dust, especially if it is clean and lint-free. It may be useful early in the process, but it does not have the same lifting action.
An ordinary cloth can push the finest dust along the grain or leave some behind. It may also introduce lint, which creates another problem just before finishing.
The tackiness of the specialist cloth is what makes it useful at the last stage. It gathers the particles rather than merely disturbing them.
That does not mean every surface needs to be attacked with a new cloth. The two-stage method keeps the process economical. Use the older cloth for the heavier dust, then let the cleaner one make the final pass.
Preparing for oil, wax, paint and stain
The same principle applies across many finishes, although the finished appearance will differ.
Before Danish oil, a clean surface allows the oil to penetrate evenly and show the grain without dust being sealed beneath it. Before wax, it helps create the smoother feel people expect from a waxed surface. Before paint, it reduces the risk of small gritty marks becoming fixed into the coat.
Stain requires a little more caution because timber species, sanding level and stain type can all affect the result. Test first on an offcut or hidden area. A well-prepared surface is important, but so is knowing how that particular timber will receive the colour.
Whether the project is hardwood or softwood, the preparation should suit the finish that follows.
This is part of learning to see woodwork as a sequence. Each step leaves the material ready, or unready, for the next.
Watch the method in the video
In the accompanying video, I show what the cloth is, how it is used and why that final wipe matters.
Video -> What Is a Tack Cloth and Why Use One Before Finishing Wood?
The written explanation gives the deeper reasoning, while the video lets you watch the movement and pressure rather than relying on words alone.
You can see how modest the action is. There is no complicated technique, expensive machine or long process. It is simply a careful final wipe before the finish goes on.
A modest step with a visible reward
There is nothing dramatic about wiping down a sanded piece of timber. It takes only a short time, and the tool itself is inexpensive and unglamorous.
Yet the difference can feel miraculous.
Students see the dull, dusty surface change before their eyes. The grain becomes clearer. The timber feels cleaner. What looked ordinary begins to resemble wood that has already been polished.
That moment helps a beginner connect effort with outcome. The sanding was not wasted. The careful progression through the grits mattered. The final wipe revealed what was there all along.
A tack cloth is a small piece of workshop knowledge, but it teaches something larger. Good finishing begins before the finish is opened.
It begins with noticing what remains on the timber, understanding what will happen if it stays there, and taking the time to remove it properly.
That is the difference between simply applying a product and preparing the wood to receive it.